
 373
373
Install SABnzbd on Windows
- Go to the official SABnzbd website.
- Get the Windows installer.
- Run the installer and follow the setup prompts.
After installation, launch SABnzbd. It will open automatically in your default Web browser.
Start the Setup Wizard
When SABnzbd opens for the first time, the setup wizard will begin.
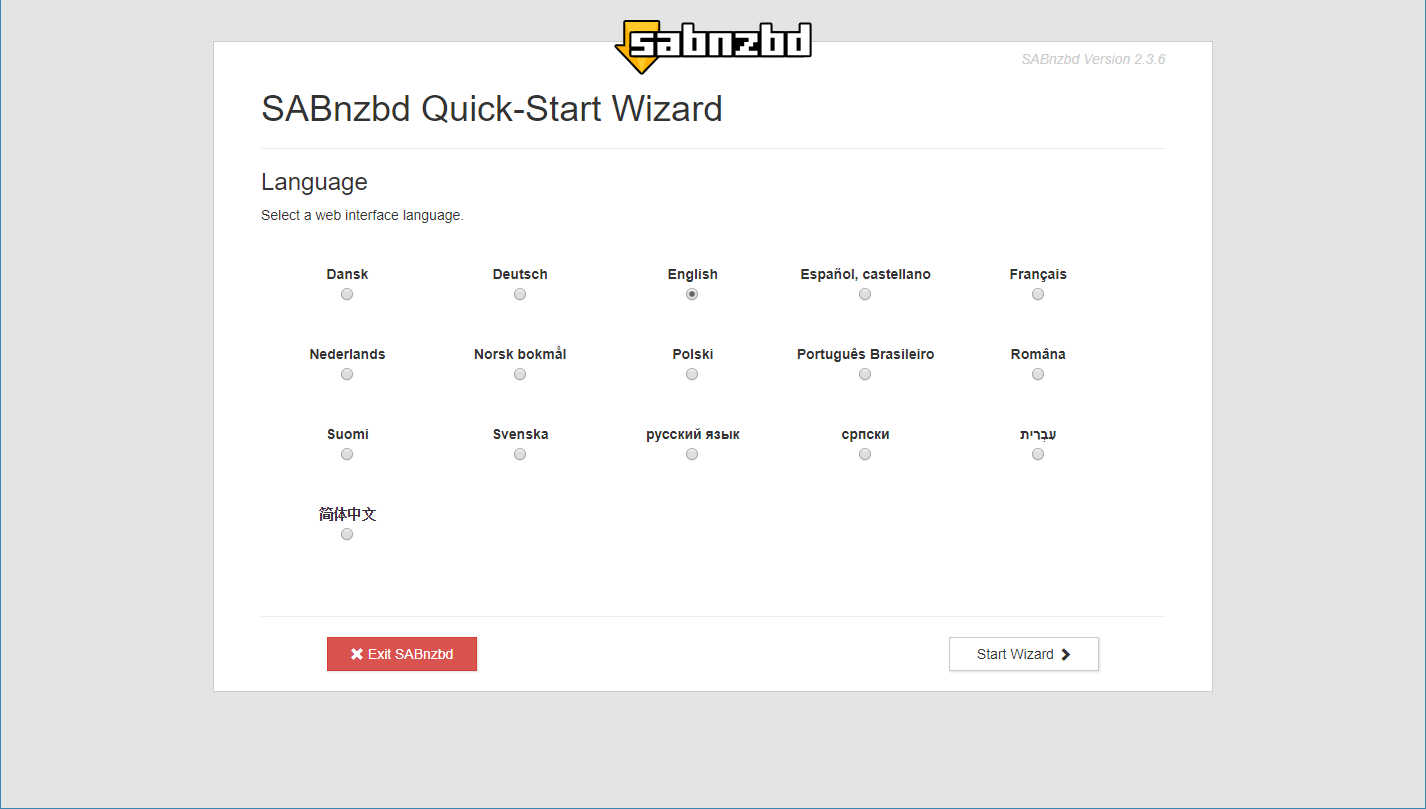
Step 1: Select Language
Choose your preferred language and continue.
Step 2: Configure SunnyUsenet Server
Enter your SunnyUsenet connection details exactly as provided in your account confirmation.
- Host: news.sunnyusenet.com
- Username: Your SunnyUsenet username
- Password: Your SunnyUsenet password
- SSL: Enable for an encrypted connection (recommended). This will automatically adjust the port.
- Port: Automatically set based on SSL (563 for SSL, 119 without SSL).
- Connections: Enter the number of connections included with your plan. If unsure, start with 20.
- Certificate Verification: Set to Strict. If you encounter connection issues, switch to Minimal.
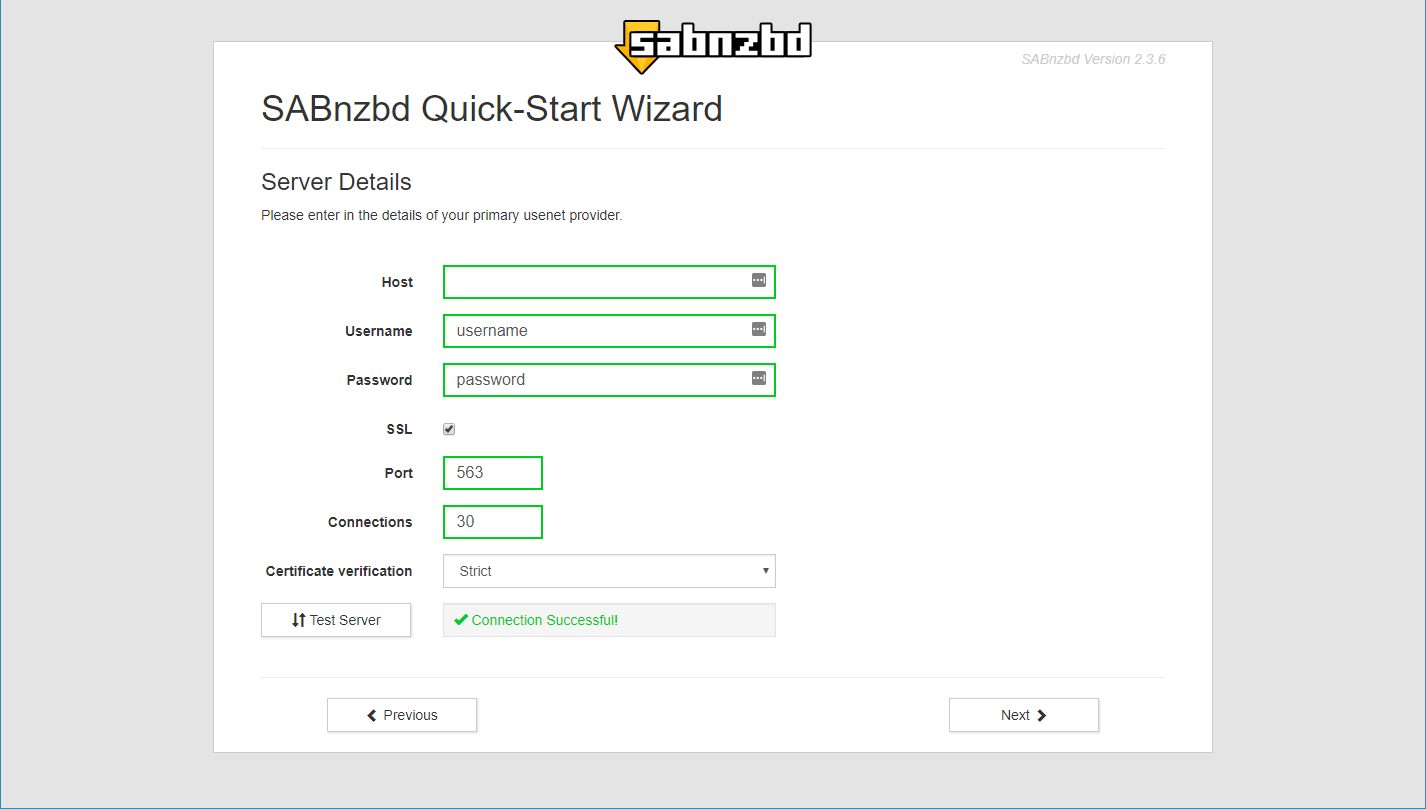
After entering all fields, click the Test Server button to confirm your settings are correct.
SABnzbd will try to connect using the details you entered and show a result message in the window:
- Successful: The connection is confirmed. Proceed to the next step.
- Connection failed: SABnzbd shows a detailed error message. Review your username, password, SSL setting, port, and certificate verification, then test again.
If the test succeeds, continue to the next step. If it fails, review your username, password, SSL setting, and port before proceeding.
Step 3: Review Folder Settings
SABnzbd will display default folder locations for temporary and completed data.
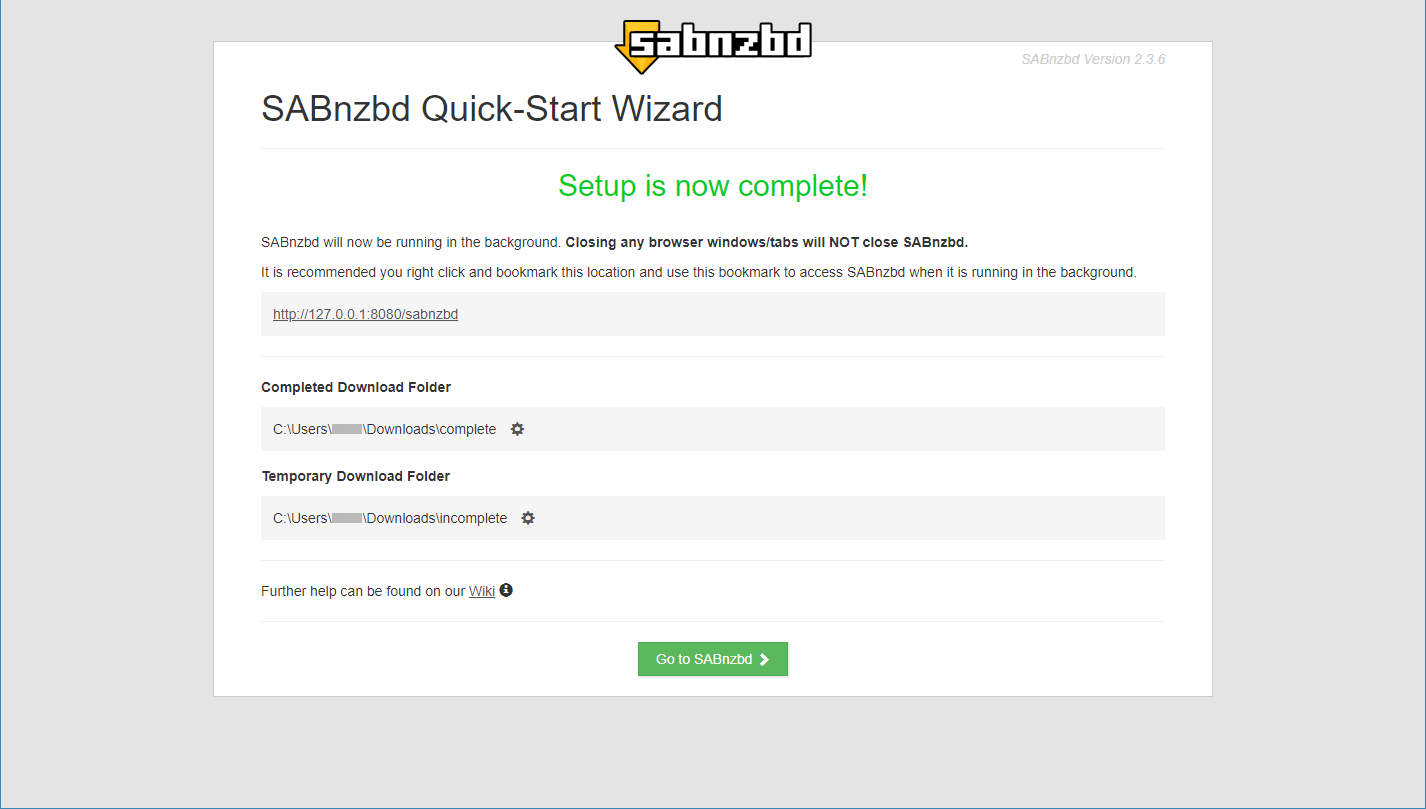
In most cases, no changes are required. Continue using the default paths unless you have a specific location you want to use.
Step 4: Finish Setup
Complete the wizard to finalize your configuration.
SABnzbd will reload and apply your settings.
Confirm Connection Status
After setup completes, SABnzbd will connect to SunnyUsenet.
To verify the connection in the interface:
- Open SABnzbd in your Web browser
- Go to Settings (gear icon on the main screen)
- Select Servers
Look for your SunnyUsenet server in the list:
- A green status indicator and an active connection count confirm a working connection
- If the server shows errors or no active connections, the connection is not working
- 0 connections with no errors usually means the server is idle, not broken
You can also return to the main screen and check that activity appears when items are added to the queue.
If the connection is not active:
- Recheck your username and password
- Confirm SSL and port alignment
- Review certificate verification settings
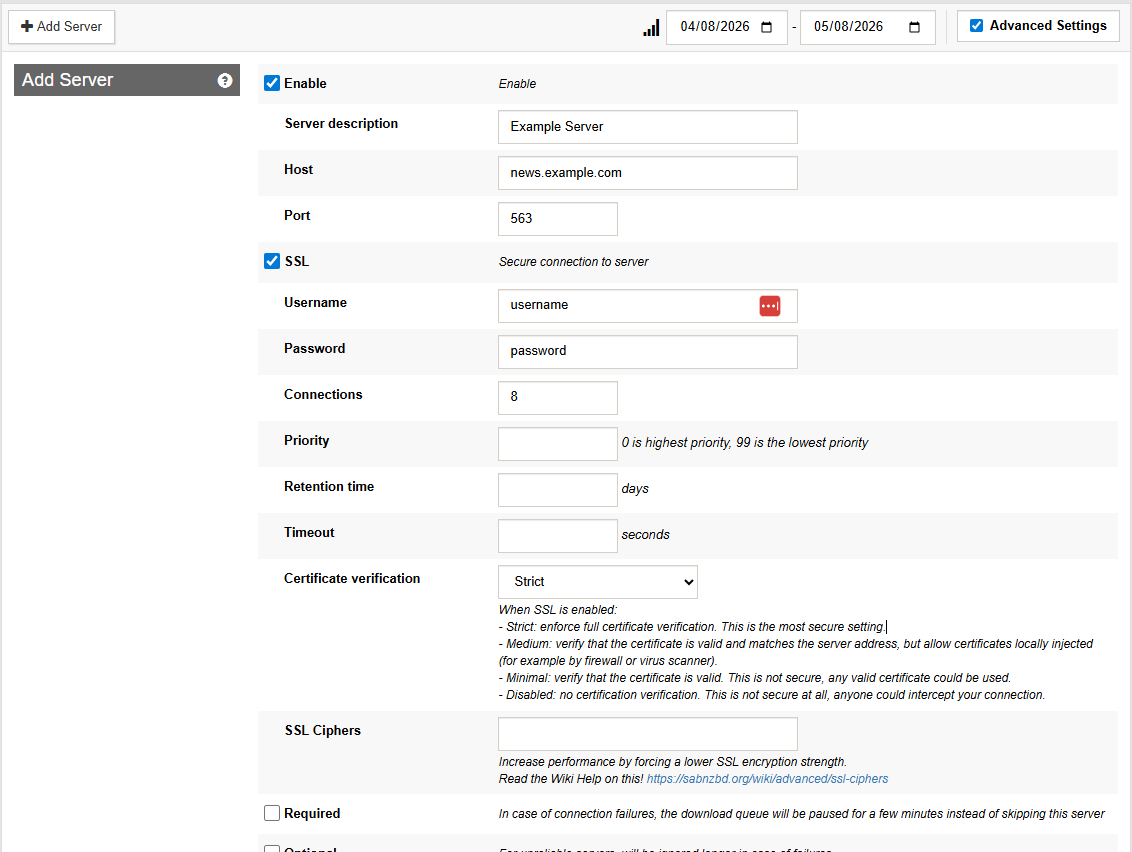
Update Server Settings Later
You can change your configuration at any time:
- Open SABnzbd in your Web browser
- Go to Settings (gear icon on the main screen)
- Select Servers
- Edit your SunnyUsenet server
Common adjustments include:
- Changing connection count
- Switching SSL on or off
- Updating login details
After Setup
Once configured, SABnzbd manages the full Usenet process in the background.
Using the Web interface, you can submit NZBs and SABnzbd will handle:
- Server connections
- Article processing
- Repair and unpacking
For best results, pair SABnzbd with a Usenet search tool to streamline how you find and queue NZBs.
Troubleshooting
If performance or connection issues occur:
- Increase connections gradually
- Confirm SSL is enabled
- Verify your Internet connection
- Check SABnzbd logs for errors

